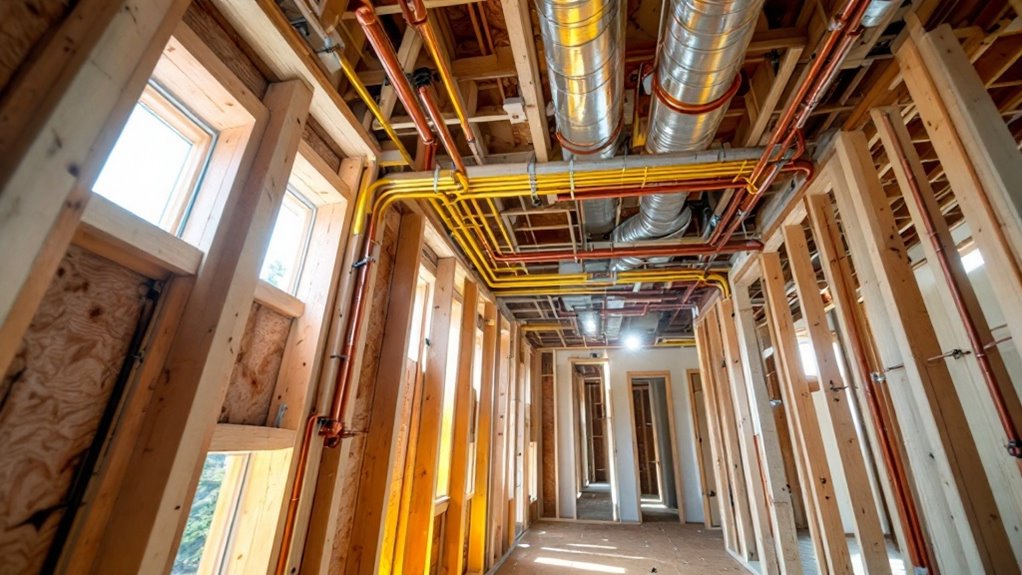
Your pre drywall inspection is an essential checkpoint that can save you thousands in future repairs by catching issues while they’re still easy to fix. During this phase, you’ll verify that electrical, plumbing, and structural elements meet code requirements before they’re hidden behind walls. Professional inspectors will document everything with photos and detailed reports, ensuring proper installation of critical systems. Let’s explore what specific items you should have on your inspection checklist.
What Gets Inspected During a Pre Drywall Walk-Through
“During a pre-drywall inspection, your inspector will examine several vital components that’ll soon be hidden behind walls and ceilings,” says Geremey Engle, owner of Ellingwood Pro, a home inspector in Winchester Va.
They’ll check your electrical systems, verifying proper wire routing, outlet placement, and junction box installations for safety and code compliance. You’ll get insights into your home’s structural integrity through framing inspections and load-bearing wall evaluations.
Your inspector will thoroughly assess the plumbing layout, examining pipe connections, ensuring proper venting, and confirming adequate water pressure capabilities.
A thorough plumbing inspection reveals critical details about your home’s water systems, from pipe integrity to pressure performance.
They’ll also look for correct insulation installation, HVAC duct positioning, and window flashing details.
Want to make the most of this essential inspection? Take photos of everything your inspector points out, especially utility locations and structural elements, as this documentation will prove invaluable during future home improvements or repairs.
Key Benefits of Pre Drywall Inspections
Three major benefits make pre-drywall inspections an invaluable investment for your new home construction project. When you catch issues early, you’ll save significant money on repairs that would be much costlier after drywall installation. The inspection benefits extend far beyond immediate cost savings, giving you peace of mind and protecting your investment.
| Benefit Category | Short-Term Impact | Long-Term Value |
|---|---|---|
| Cost Savings | Prevent expensive fixes | Increased home value |
| Quality Control | Verify proper installation | Improved durability |
| Documentation | Photo evidence | Future repair reference |
| Peace of Mind | Construction oversight | Warranty protection |
Pre drywall advantages include the opportunity to verify electrical, plumbing, and structural elements before they’re hidden forever. Wouldn’t you rather identify and address any concerns while components are still visible and accessible?
Common Issues Found Before Drywall Installation
Although pre drywall inspections reveal many potential issues, several problems consistently appear during these vital examinations of new home construction.
You’ll often find plumbing issues like improperly secured pipes, misaligned connections, or missing pipe insulation that could lead to future leaks or inefficiencies.
Electrical faults, including missing junction boxes, improper wire routing, or insufficient support for outlets, are also common discoveries.
During your inspection, you might spot structural concerns like damaged floor joists, inadequate fireblocking, or missing hurricane straps.
Have you checked the framing components carefully? Proper spacing between studs, adequate support for load-bearing walls, and correct window installation are critical elements that need verification.
Don’t forget to examine ventilation ducts and verify they’re properly sealed and supported!
Essential Checklist for Pre Drywall Inspections
Before you begin your pre-drywall inspection, you’ll want to prepare a thorough checklist that covers every vital component of the build.
Having the right inspection tools, like a reliable flashlight and measuring tape, will guarantee you don’t miss any essential details.
Your fundamental pre-drywall checklist should focus on these key areas:
- All construction materials must be properly installed, including electrical wiring, plumbing pipes, and HVAC components.
- Window and door framing should be level, square, and properly secured with appropriate spacing.
- Fire blocking, insulation, and vapor barriers need to be correctly placed and sealed throughout.
Remember to document everything with photos and detailed notes as you go through your inspection.
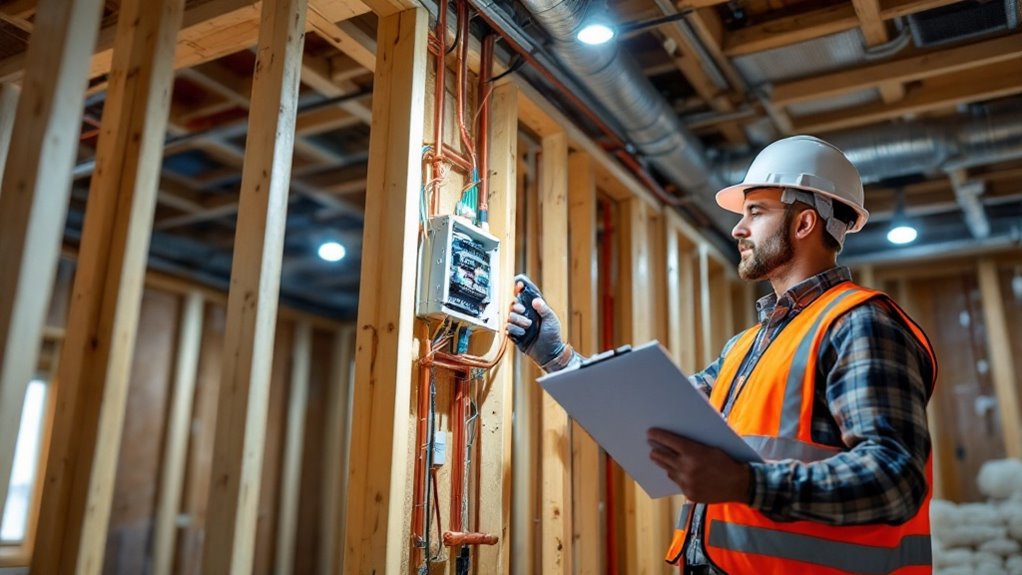
Have you considered bringing along a professional inspector to catch anything you might’ve missed? Their expertise can be invaluable at this vital stage.
The Cost Savings of Early Problem Detection

When you catch construction issues during the pre-drywall phase, you’ll save significant money compared to fixing problems after completion. The cost efficiency of early detection can prevent expensive repairs that might require tearing out finished walls and redoing work.
Consider this: fixing an incorrectly placed electrical outlet before drywall might cost $100, but after completion, you’re looking at $500-1000 to repair walls and restore finishes.
You’ll find similar savings with plumbing, HVAC, and framing corrections when caught early. Have you thought about how much you’d save by catching window flashing issues now rather than dealing with water damage later?
Don’t risk costly repairs down the road – invest in thorough pre-drywall inspections to protect your investment and guarantee your home’s long-term value.
Hiring a Professional vs. Self-Inspection
Many homeowners wonder whether they should tackle pre-drywall inspections themselves or hire a qualified professional inspector for the job.
While self evaluation techniques can help you spot obvious issues, professional expertise brings essential knowledge that you mightn’t have.
- A licensed inspector understands building codes, structural requirements, and complex mechanical systems that aren’t always visible to untrained eyes.
- Professional inspectors carry specialized equipment and tools to detect moisture levels, electrical issues, and structural problems.
- You’ll receive detailed documentation and reports that can protect you legally if issues arise later.
When it comes to such a vital inspection, investing in professional help often pays off.
Can you really risk missing important defects that could lead to costly repairs down the road?
Consider your experience level carefully before making this important decision.
Timing Your Pre Drywall Inspection
Scheduling your pre-drywall inspection at the perfect moment can make all the difference in catching potential issues.
You’ll want to time your inspection after all rough-ins are complete but before the drywall installation begins. This sweet spot typically occurs when electrical, plumbing, and HVAC systems are in place and have passed their initial inspections.
Your timing strategies should account for your builder’s schedule and local building codes. Most builders will give you a heads-up when they’re approaching the drywall phase, but you’ll need to be proactive with inspection scheduling.
Don’t wait until the last minute – professional inspectors often book up quickly! Remember, once the drywall goes up, you won’t be able to see what’s behind it.
Have you contacted your inspector to discuss their availability for your upcoming inspection?
Documentation and Photography Best Practices
Thorough documentation during your pre-drywall inspection serves as your safeguard against future issues and uncertainties.
By following proper documentation techniques and photography tips, you’ll create a detailed record that protects your investment.
- Take clear, well-lit photos from multiple angles, making sure to capture every wall, electrical outlet, plumbing fixture, and structural element before they’re concealed.
- Label all photos with dates, locations, and specific notes about any concerns or observations you’ve made during the inspection.
- Create a detailed written report to accompany your photos, including measurements, material specifications, and any discussions with contractors.
Remember to store your documentation securely in both digital and physical formats.
When done correctly, your pre-drywall documentation becomes invaluable evidence if questions arise during or after construction.
Wouldn’t you rather have too much documentation than not enough?
Building Code Compliance at the Pre Drywall Stage
Because building codes form the foundation of safe construction practices, understanding compliance requirements at the pre-drywall stage is absolutely vital for your home’s integrity.
You’ll need to guarantee that all framing, electrical, plumbing, and mechanical systems meet current building regulations before the walls are closed up.
During this phase, you’ll want to verify that your builder has followed proper inspection standards for essential elements like fire blocking, draft stopping, and proper spacing of studs.
Have you checked that all required permits are posted and up-to-date?
Don’t forget to confirm that electrical boxes are properly secured, plumbing vents are correctly sized, and load-bearing walls meet structural requirements.
Next Steps After Your Pre Drywall Inspection
Once you’ve completed your pre drywall inspection, it’s crucial to document findings and establish a clear timeline for addressing any issues.
Your inspection checklist serves as your roadmap for the next steps, ensuring nothing falls through the cracks.
A well-organized inspection checklist guides your post-inspection journey, preventing oversights and maintaining quality control throughout construction.
Here’s what you should focus on immediately after your inspection:
- Review the inspection report thoroughly and highlight any concerns that require immediate attention
- Schedule follow-up meetings with your contractor to discuss necessary corrections and modifications
- Document all changes with photos and written confirmations before drywall installation begins


